Friday 7 November 2014

Update 15: Central Gondor and Steed of the Ship-Kings

Update 15:Gondor Aflame has arrived and it includes the new level 100 area of Central Gondor, the Beorning class and the offensive Big Battle "Retaking Pelargir".

The new quests in Volume IV, Book 2 of the epic quest helps explain why we're going to Central Gondor nicely but involves a lot of running back and forth through Dol Amroth.

So far every time I've been to Central Gondor it's been night time in-game (although the looming cloud of the Dawnless Day probably makes everything darker too) so I still haven't had a good look around. I found one of the new treasure chests so it'll be fun to try and find the others to complete the deed. Who doesn't like a good treasure hunt?

The first town you encounter in Ringló Vale is Ethring. It straddles a river and has crafting facilities and quartermasters for two new factions: Men of Ringló Vale (which mainly offer new class-related essences such as Essence of the Sharp Claw for Beornings) and Pelargir (which offers legendary item titles and consumables). After completing the local quests, to earn rep with the Men of Ringló Vale you'll probably need to do tasks, repeatable bounties and find rep tokens that drop off mobs occasionally: Ornamental Skulls are worth 50 points and Weathered Gondorian Relics are worth 250 points.

The Pelargir Quartermaster also offers the lovely Steed of the Ship-Kings for 200 Central Gondor Silver Pieces at Kindred. I'd definitely like to add this one to my collection.


There are also new warbands and rare mobs to hunt down: watch out for the spiders!

Scythe-jaw: rare arch-nemesis south of Ethring

Monday 27 October 2014

Instances: Great Barrow Cluster

The Great Barrow, also known as Othrongroth, is located in the Southern Barrow-downs in Bree-land. It was once an important burial-ground protected by the Dúnedain of Cardolan but a plague wiped out many of its protectors and the Witch-king of Angmar seized the opportunity to fill it with their minions, with Sambrog as its chief wight.

Entrance to the Great Barrow

The instances here must be completed in order to unlock the next one.

The Maze - 6 person instance

Two paths lead from the entrance to the first boss, the Barrow-wight Caller, who waits at the bottom of the stairs. Clear out the minions by pulling them up the stairs (will reset the boss). The Caller summons several wights who should be dealt with first. When he reaches 20% morale, the boss summons barrow-crawlers who do a knock-back (don't be near the stairs) or burst into poison clouds (difficult to avoid, so may require lots of healing).

The Barrow-wight Caller's room
After a bit more maze (turn left at intersections), Gaerdring and Gaerthel wait at the bottom of another set of stairs. Gaerdring attacks first and summons minions until he dies, then Gaerthel joins the fight.

Gaerdring and Gaerthel's room

Thadúr - 6 person instance

The show starts when the wights at the top of the stairs to the left of the hall entrance has been defeated, but it's better to clear the room first. The wights may cast a stun or apply disease debuffs. Thadúr challenges you to defeat barrow-lights quickly, first 1, then 2, then 3, then 4 (pull them to the middle and AOE, the timer starts from when the first barrow-light is killed).

Hall of the barrow-lights and wights
After defeating the lights, a green glowing tunnel opens on the right side of the hall leading down to a watery room where Thadúr waits. He becomes invincible after each time he loses 25% morale and summons minions which must be defeated to make the boss vulnerable again.

Thadur's room

Sambrog - 6 person instance

In the first room, wights appear upon reaching the top of the stairs across from the entrance. Go through the tunnels and open the Skull Door (requires a Skull Key from completing the first two instances). Clear more tunnels and caverns and finally reach Sambrog's brightly lit room. As you approach, he extinguishes the lamps. The fight with him is fairly easy - stay out of the purple stuff on the ground and kill the fell-spirits that channel green beams of healing at him.

Sambrog's room

Friday 24 October 2014

Adventures of Floid and Dewitt

Floid the Mighty Steed and Dewitt the Explorer are a pair of NPCs that can be found in some remote and scenic locations throughout Middle Earth. There are two exploration deeds related to finding them in all their hiding spots.


The Adventures of Floid and Dewitt

Finding Floid and Dewitt in the following locations grants the title "the Wanderer":

Dunland - looking out over the Dunbog (accessed via a secret passage hidden behind some foliage in the tunnel to the Pristine Glade)
Enedwaith - keeping an eye on the giants of Thrór's Coomb
Evendim - admiring Annúminas from an island SW of Tyl Ruinen
Lone-lands - watching from Weather-top
Lothlorien - overlooking the Celebrant and the Golden Forest
Mirkwood - gazing at the grim Ashenslades, SE of Garmadh-maudhûl
Moria - contemplating the tall sculpture north of Jazârgund

The Adventures of Floid and Dewitt: Part Deux

Finding Floid and Dewitt in the following locations grants the title "the Vagabond":

East Rohan - with a great view of the Argonath
Eregion - from the top of the Redhorn Pass
Forochel - a cold cliff north of Barad Gaurhoth overlooking the bay
The Great River - admiring the Cuthstan from Aster Hill
Misty Mountains - a snowstorm's coming to Goblintown (follow the path to the Black Crack, about halfway is a ledge with 3 rocks and a short tree; hug the cliff to reach another ledge with a fallen tree pointing towards a lower ledge with a big rock - mount-up and jump down!)
Trollshaws - watching over the Bruinen valley from the High Moors
Wildermore - looking across the lake from the frozen waterfall towards distant Forlaw

Tuesday 14 October 2014

Instances: Mirobel Cluster

The Library of Tham Mírdain across the Glanduin River
The School of Tham Mírdain up on the hill

Located in Mirobel, a region in the south-west of Eregion, Tham Mírdain translates as the "Hall of the Jewelsmiths" and is also known as the Ring-forges of Eregion where Celebrimbor and Annatar (Sauron) forged the rings of power in the Second Age. Amarthiel planned to reforge the ring Narchuil here. Her minions are now searching the library for the secrets of ring-lore, while Saruman's minions search the school.

These instances are fairly quick and easy, but still interesting. Soloable at level 100 (as a lore-master, I used my sabre-tooth cat for the trash mobs and let my bear tank the bosses).

The Library at Tham Mírdain - 3 person instance

The Library held ancient lore from the Second Age. It withstood an attack by Sauron against Eregion, but Elrond moved many of the surviving books to Rivendell for safe-keeping.

Ancient books

Clear out the bottom floor of the library, then head upstairs and clear out the two wings, each with a boss. The final boss will then be waiting downstairs in the courtyard. The pale-folk tend to apply lots of poison debuffs. Challenge mode is to not kill the birds in the courtyard before defeating Chieftain Gûrsh.

Central courtyard

The School at Tham Mírdain - 3 person instance

The School was a highly regarded place of learning amongst the Noldor elves in the Second Age, but is now a ruin.

The courtyard

Clear around the edge of the courtyard then move through the middle to defeat Llygad the Blade and his allies. Upstairs Chief Warrior Thurgtârk and his allies guard the door to the classroom. Commander Târsh hides behind a class full of Dunlendings and orcs who have set books on fire (the challenge mode is to extinguish the books before they burn completely). Take out small groups at a time to get to him.

The classroom

Thursday 9 October 2014

Scenic Tour: Enedwaith

Myndariel is finally questing through Enedwaith, helping out the Grey Company and slowly earning the trust and respect of the Algraig. There are some fun little discovery deeds (hobbit lamp-posts, dwarf markers, little wonders, the fishing hole) and a variety of landscapes and ruins to explore. One of my favourite places was finding the settlement of Maur Tulhau tucked away in a valley and overshadowed by huge rock formations.

Maur Tulhau - a hobbit village
Two other major landmarks include Lhanuch, the main town with a crafting hall, and Harndirion, an encampment at the base of a ruined watchtower with class trainers and class-specific (but not class-restricted) armour sets.

Looking across Enedwaith: Lhanuch (cluster of huts in the middle) and Harndirion (tower on the distant hill)
Nár's Peak is home to an ancient dwarven library, Zudrugund, built into the sides of the Misty Mountains, overlooking Thrór's Coomb. The librarians are concerned about the giants and gwiber (dragons) in the valley and the mysterious Nár has uncanny insight into the secret plans of the Grey Company.

Zudrugund
The southern region of Enedwaith is oppressed by creatures of evil.The Lich Bluffs were once a revered burial ground for the people who had died in various wars throughout the ages but now there are wights and Oathbreakers amongst the barrows, while the Mournshaws is a dreary wooded valley haunted by the mysterious Wild Huntsman and fell spirits.

Lich Bluffs
Mournshaws

Enedwaith is also the location to two level 75+ raid instances: Draigoch's Lair in Thrór's Coomb and Ost Dunhoth in the Lich Bluffs.

Tuesday 30 September 2014

Instances: Fornost Cluster

The Entrance to Fornost

Fornost was once a major city, the capital of the Arthedain realm founded by Amlaith, a descendant of Elendil and Isildur. However, it was overrun by the Witch-King of Angmar and held for a year before being driven out by an alliance of men and elves led by Eärnur of Gondor and Glorfindel of Rivendell. The city was left in ruins.

Now, evil creatures from Angmar have crept back in and taken up residence. A group of concerned Free Peoples have made camp nearby in the Fields of Fornost to keep watch and find out what is going on.

The instances of Fornost must be unlocked sequentially by completing each instance, starting with the Wraith of Water. Defeated mobs give Rangers of Esteldín reputation.

Wraith of Water - 6 person instance

This instance takes place near the tower of Barad Eithel in the north-west of Fornost.

The pool of silence

To reach the tower, go through the area with orcs and goblins. After defeating the overseer, you'll find one of holding pens contains Sara Oakheart who asks you to help her rescue other prisoners and escort them to safety (a pair of bosses guard the entrance). Beyond the pens is a shallow pool of silencing water and dreadmists (fight on the land). Megoriath the Wraith of Water lurks in the tower. The water here also causes a silence so use the stepping stones and try to stay in melee range to avoid his powerful ranged shadow attack.

Wraith of Earth - 6 person instance

This instance takes place near the tower of Barad Harn with trebuchets aimed out at the Fields of Fornost.

Weapons of war

Clear out the trolls and goblins and destroy the trebuchets using the powder boxes. Inside the tower, there are three levers to activate on the ground floor to unlock the door to the stairs. Fight to the top of the tower and Rhavameldir the Wraith of Earth is waiting with a few minions.

Wraith of Fire - 6 person instance

This instance takes place near the tower of Barad Narthan.

Burn the idols to Sauron

Follow the narrow path that winds around outside the tower defeating orcs and burning idols to Sauron as you go (use the torch from nearby bonfires). The first boss, Riamul occasionally puts up a shield preventing damage while he has summoned minions alive. The second boss Zanthrug is an AOE-fest as lots of mobs fill the courtyard. Fight your way through the tower full of burning wights to the last idol - destroying it summons more attackers - then continue up to the top and Brogadan. He needs to be killed quickly before the room fills with fire.

Wraith of Shadow - 6 person instance

The final instance takes place near the tower of Minas Erain in the north-east. This is the largest tower with many levels.

Fight to the top of the tower

The entrance (at the top of Barad Narthan) has a great outlook over Fornost. The ruins around Minas Erain are filled with a variety of mobs, as well as many skeletons, remains of the Oathbreakers cursed by King Arvedui for betraying the city into Angmar's power. Inside the tower, clicking an offering bowl summons a warg boss. Further up the tower, clear the groups of spirits before defeating the second boss and her minions.

The final boss, Remmenaeg, is on the roof of the tower and is quite difficult. He is invincible until all three braziers are lit. He often interrupts attempts to light the braziers and when each brazier is lit, mobs are summoned that need to be dealt with. The braziers only stay lit for a short time, offering a small window to reduce the boss' health, then the process needs to be repeated. Remmenaeg also casts auras of dread and fear and reflects most damage types (Common, Westernesse, Ancient-Dwarf and fire).

Monday 29 September 2014

Update: New guides and galleries

Hi. I hope you had a great weekend. I did. It was a warm and sunny spring day and I enjoyed basking in the sun with a good book and a big beanbag. I also got my captain to level 75 and got her a warsteed (wow it's such a different experience on a melee class compared to ranged!), and added some extra guides and galleries to the blog here:

My captain's a metalsmith so she helped model for the new Forged: Crafted Heavy Armour gallery.

The Resources and Crafting Instances guide is designed to provide some quick reference information about where you can go to get the ore, leather, wood or scholar resources you might need.

Finally, since I'm working on visiting everything in the Instance Finder and sharing a bit about them here, I've added an index called the Guide to Instances to make it easier to find relevant information.

Thursday 25 September 2014

Captains and Custom Heralds

My captain
I've been leveling my captain recently and finally found out how to get the buffs from the standard and the variety of herald appearances from the armaments. Previously I thought you had to sacrifice the physical mastery and morale buffs from the standard and equip the armaments (which only buffs the herald) if you wanted a different looking herald, such as a Swordswoman or a Squire. Fortunately, that's not the case. I hope the following information will be useful for other captains too.

To preview all the different herald appearances available, visit Lotro-Wiki.com - Herald.

  1. Equip your Standard of choice of the appropriate level in your ranged slot (e.g. Intricately Woven Supreme Standard of Hope, minimum level 60).
    Standard is in the middle, in the Ranged slot
  2. Make, buy or receive any Herald Armaments (e.g. Minor Commoner Herald Armaments, minimum level 20, made by tailors). Level doesn't matter. The type of herald armaments doesn't matter.
  3. Talk to the Captain Trainer and barter your herald armaments for a Receipt of Armament Exchange.
    Barter Armaments for Receipt of Armament Exchange
  4. From the drop-down list of barter filters, select the "Token to X Armaments", where X is the herald pet you want to change the appearance of (i.e. to change the appearance of the herald summoned when you use Call to Arms: Archer, select "Token to Archer-Armament"). Swap your Receipt of Armament Exchange for the Herald appearance you want and are eligible for (note: Lossoth requires Kindred reputation standing and Oath-bound require minimum level 58).
    Barter Receipt for the Herald appearance you want
  5. You receive the Armaments in your bag. Right click to learn the skill.
    New Armaments skill item
  6. The Skills panel will have a new option in the Call to Arms section. Drag your new ability to your quickslot bars and enjoy. The original herald will still be available as well. If you wanted to, you could repeat this process and collect the whole set of appearances so you could switch from using a Commoner to a Pilgrim or a Defender or a Maid-at-arms or a Footsoldier and so on.

Before

After

Wednesday 24 September 2014

Instances: The Annúminas Cluster


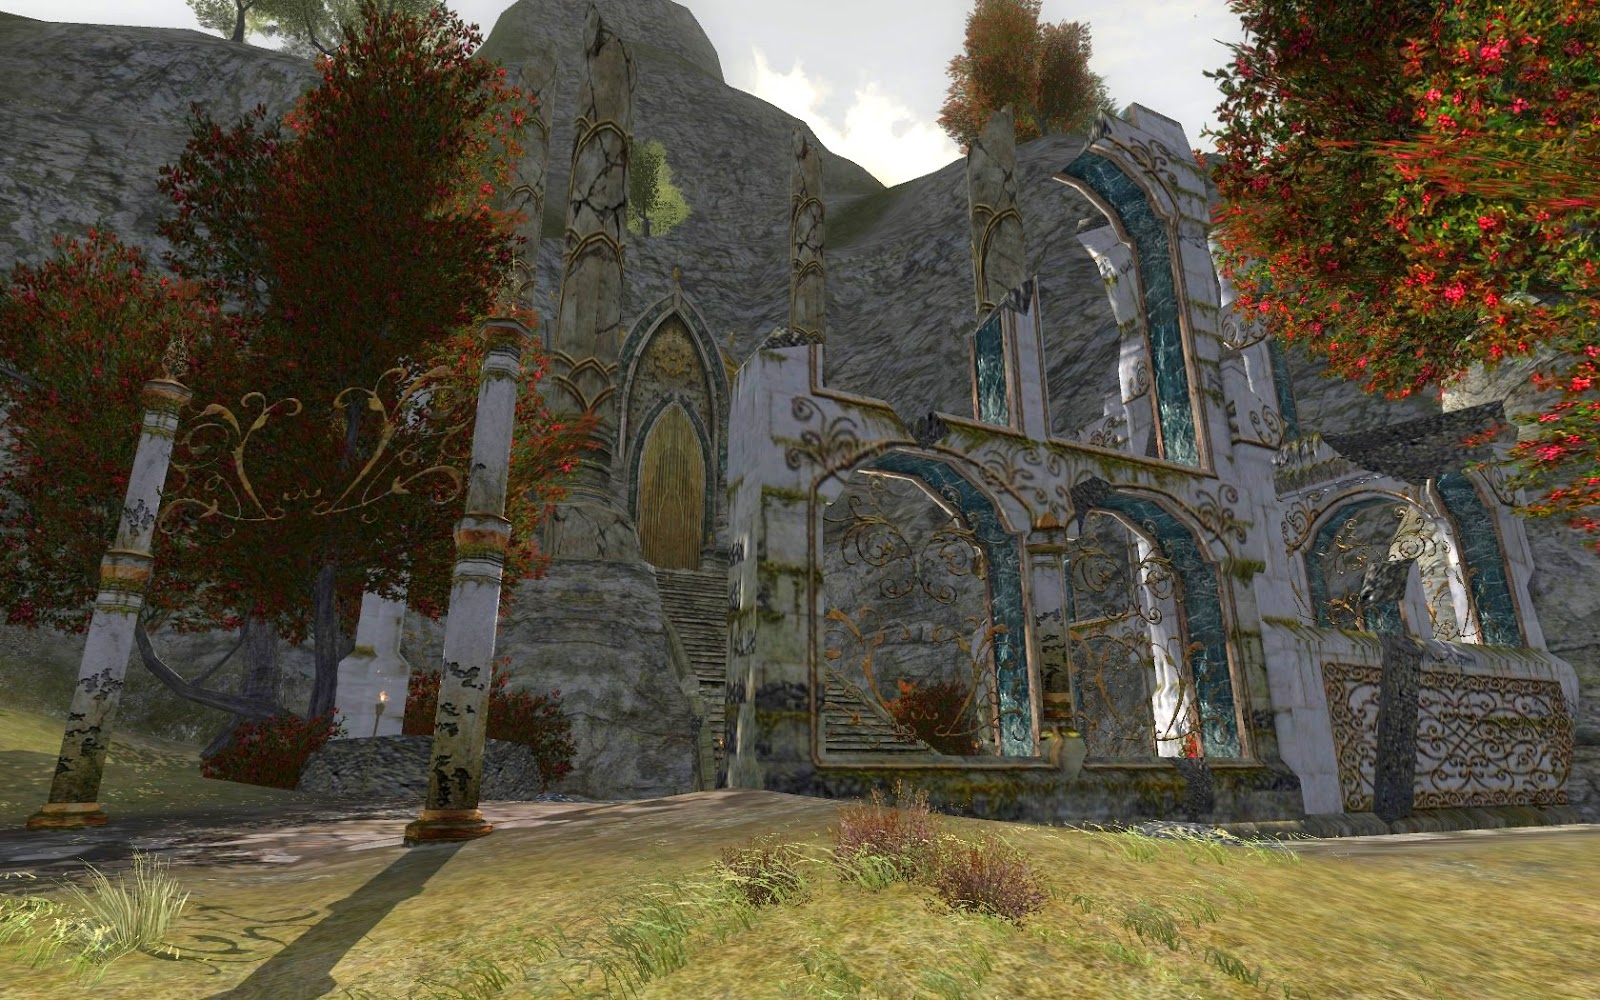
Annúminas is a majestic ruin in Evendim, the former capital of the Kingdom of Arnor which was founded by Elendil at the end of the Second Age.

Elendil and his sons escaped the downfall of Númenor (Sauron and those who worshipped Melkor, the original Dark Lord, tried to wipe out those who were faithful to Eru and the Valar). They took with them palantíri (seeing-stones) and the sword Narsil (a family hierloom from the First Age filled with power). The faithful survivors of Númenor became known as Dúnedain.

Their ships were separated in a storm so Elendil settled on the shore of Lake Nenuial in Evendim and founded Arnor while his sons (Isildur and Anárion) ended up further south-west and founded Gondor. They kept up communication by using the palantíri. Elendil was killed in the battle at Barad-dûr against Sauron and Narsil broke under his body. Isildur took the hilt and sliced Sauron's hand, severing him from the One Ring.

There were ten kings of Arnor. When the tenth king, Eärendur, died, his sons divided the kingdom between them. Amlaith, the eldest son and ancestor to Aragorn, founded Arthedain (which included regions now part of the Shire, Bree-land, North Downs and Lone-lands). His brothers founded the realms of Cardolan and Rhudaur. Annúminas was abandoned.

Glinghant - 6 person instance

The gardens of Annúminas were located in the south-east of the city. The terraces have now been taken over by Angmarim and darkwaters who cast fear and spread disease to those who wish to visit.


Use the lever on the first terrace to start an event involving waves of mobs attacking. The second terrace has three stagnant oaks to defeat. On the top terrace, defeat Nengon and his fellow darkwaters.

Haudh Valandil - 6 person instance

This was the tomb of Valandil, youngest son of Isildur and the third High King of Arnor. The sorcerors of Umbar want to raise Valandil from the dead as a powerful wight under Sauron's control. They have many minions who will try to stop you from returning Valandil's remains to where they belong.


Clear out the rooms with the Arnorian Knights and light the beacons to unlock access to the upper level. Shingrinder waits across a bridge. Beyond him, Dolvaethor sends waves of burning limrafn at you from behind a wall of fire. Once they're defeated, he runs away and sends Arnorian Wights to attack. At the top of the stairs, he waits with Valandil.

Ost Elendil - 6 person instance

The throne room of Annúminas was located on the fortified island of Tyl Annûn in the north of the city. Balhest has claimed it for himself with Angmarim and Tormented Spirits to guard him.


The key to this instance is kiting the Morelendil Guards to the windows to allow the light to dispel their protective buff. Open windows by clicking the counterweights. You also want to avoid using fire, Common, Ancient Dwarf and Westernesse damage as the wraiths have a buff called Terrible Retribution which can reflect damage back at you. Without the light buff it may be possible to defeat Guloth by healing through the attacks by the Morelendil Guards and using other damage types (e.g. light, lightning, frost, Beleriand). In the throne room, you have to defeat all the guards before you can fight Balhest and his allies.


Note: The defeated mobs in these instances give rep with the Wardens of Annúminas.